UIW Print Installation - PC
This tutorial will walk users through the steps necessary to set up a Windows-based PC to print to the UIW Managed Print program. In order to connect to UIW printers, instructions must be completed while connected to the UIW wireless or wired network. There are three scenarios for PC’s:
1. UIW issued computer joined to the AD domain
2. UIW issued computer joined to a workgroup
3. Personal PC
Scenario 1. UIW issued on Domain:
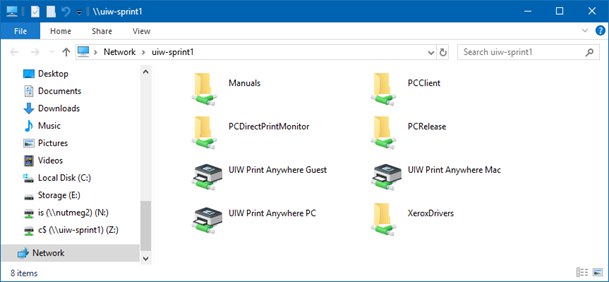
1. Click on the start button and type the following: \\uiw-sprint1.ad.uiwtx.edu to browse to the print server. You can also type this into the White search bar in the bottom left of the screen. Hit ENTER. You’ll see shared folders and printers.
2. Double-click on ‘UIW Print Anywhere PC’ to install the printer. Alternately you can right-click and ‘connect’ to install the printer too.
Scenario 2 & 3 Set up instructions:
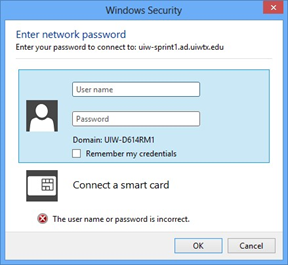
1. Browse to the print server. Click on Start, type ‘\\uiw-sprint1.ad.uiwtx.edu
2. You will be challenged for credentials, username, and password. Enter the username like “ad\<username>” and your network(email) password.
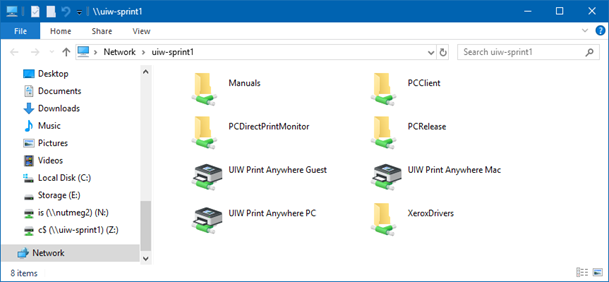
3. Double-click on PCClient, then double-click the ‘win’ folder.
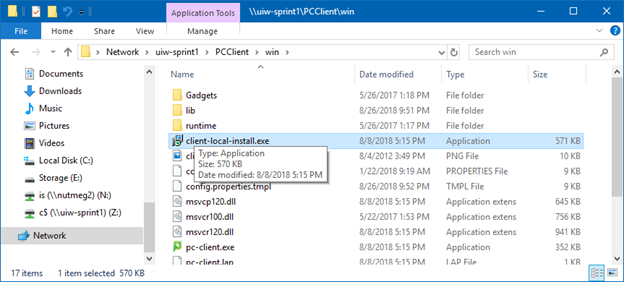
4. Double-click ‘client-install-local’ to start the installation process.
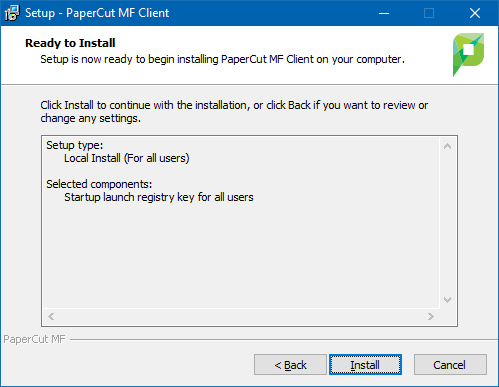
5. When prompted, click yes, Accept Agreement, next, next, install. In other words, accept defaults.
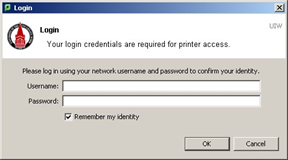
6. When the installation completes, run the program and sign into the client with your network credentials. You do not need to add the ‘ad\’ to your username here.
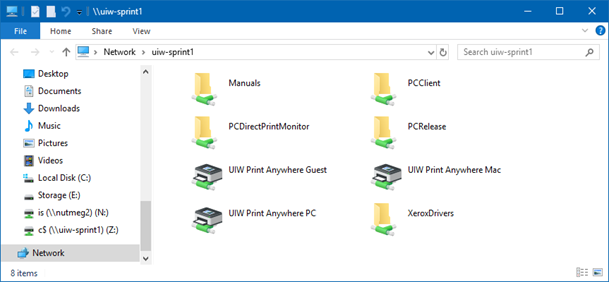
7. Now we can install the printer. Browse to the print server, \\uiw-sprint1.ad.uiwtx.edu, double-click on the ‘UIW Print Anywhere Mac’ printer. Yes, that’s not a typo, choose the ‘UIW Print Anywhere Mac’ printer.
If the PaperCut client software isn’t running, you won’t be able to print. It will look like you printed successfully, but there won’t be any documents waiting in the virtual print queue when you log into a printer and select Print Release.
We’ll place a shortcut to the program in the startup folder to make sure the client software runs when you restart the computer or log in.
1. Open windows explorer (window key+e or click the folder icon in the taskbar)
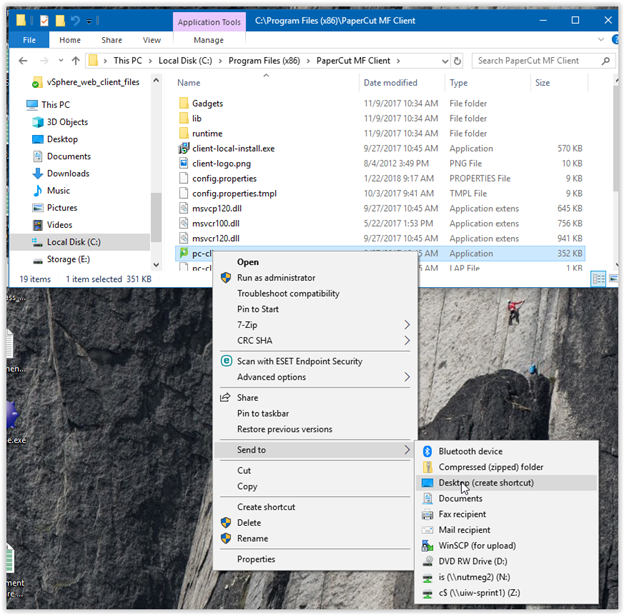
2. Navigate to ‘C:\Program Files (x86)\PaperCut MF Client’, right-click pc-client.exe, and send to desktop
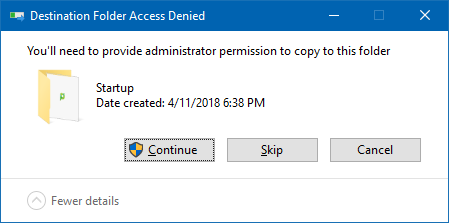
3. Navigate to your desktop, find the shortcut just created, right-click on it and choose ‘cut’.
4. Navigate to C:\ProgramData\Microsoft\Windows\Start Menu\Programs\StartUp, right-click and choose ‘paste’ in the window. If prompted for permission, choose ‘Continue’.
To test successful installation, open a document and try to print. Choose the print anywhere mac printer, then print. The papercut client will pop up and ask you to log in one last time. Enter your network username and password again and change the ‘until I log out’ option to ‘Always’, click ok. Find a printer, swipe your ID card or login manually, select print release and you should see your document waiting to be released.
Periodically you will need to renew your authentication with the print server. You can tell if this is required if you can’t connect to the printer or you get access denied when you try to print. Just click on Start and type \\uiw-sprint1.ad.uiwtx.edu, enter your credentials when prompted, click ok and you should see the shared folders and printers on the server. When entering a username, it must be in the ad\username format.