Install Cisco AnyConnect VPN for MacOS
- Ensure that your device has a working internet connection and that you have a web-bowser installed (Microsoft Edge, Google Chrome, FireFox, Safari, Brave, etc.)

-
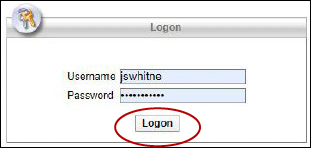
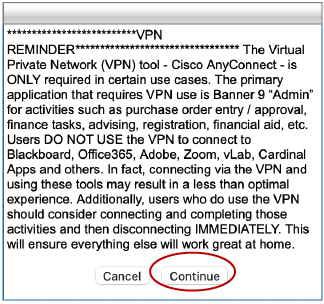
The login page will be displayed. Type in your UIW email and password (the same ones used to login to Cardinal Apps) and click 'Logon', then 'Continue'
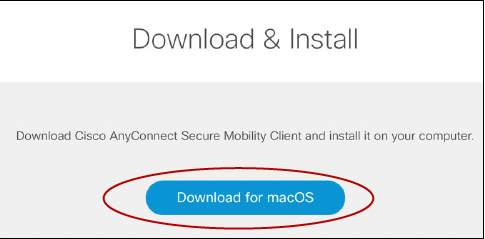
- Click the 'Download for Mac' button
Open the downloaded file. If you don’t know where to locate it, depending on your browser, downloaded files might go to a different location (download folder in Finder, desktop, bottom of browser, etc.)
a. Firefox – Downloads are located in the down arrow icon in the upper toolbar or by clicking the III icon in the upper right > downloads.
b. Chrome – Downloads appear at the bottom of the browser window, or by clicking on the three dots in the upper right corner > downloads
c. Safari – Downloads can be found by clicking on the down arrow in the upper right of your window
- After the download is complete, open the downloaded file and double click the brown icon pictured [left] to start the install.
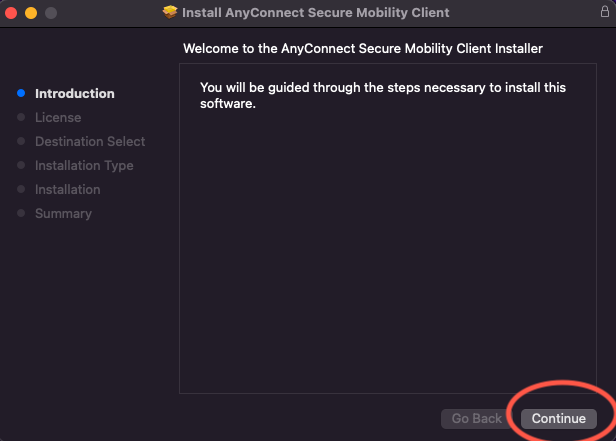

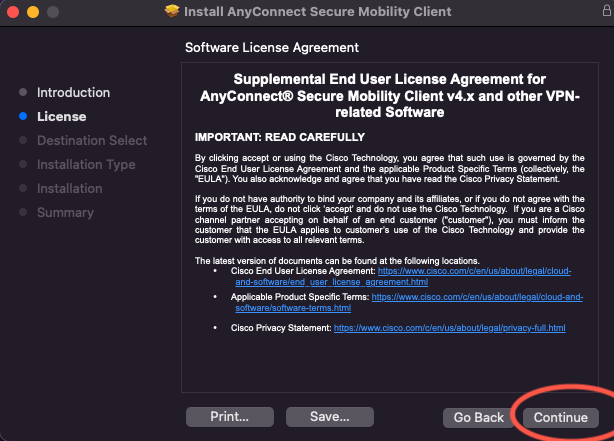
- Click Continue > Continue
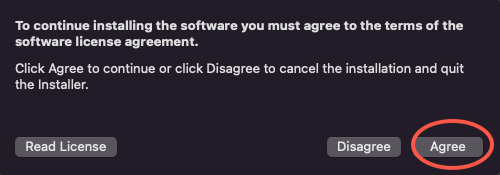
- Click 'Agree' and the installation will continue and finish!
-
You will receive this 'Attention Required' pop-up after the installation is finished, this is NOT an error, but Apple requires you to give all apps permission to use system functions. To do so, click the blue 'Open Preferences' button [pictured left]
Click the lock icon in the bottom left corner and enter your MAC password. The password you use to get into your computer.
- Click the 'Allow' button on page. You can click the lock icon once more and close the Security & Privacy page and pop-up.
- Head to your applications folder to finish the setup. Find the 'Cisco' folder and open the 'Cisco AnyConnect Secure Mobility Client' app. This is the VPN app.
- Note: Applications folder is located within Finder, alternatively, you can enter the keyboard shortcut SHIFT+CMD+A to bring up the folder.
- Type | connect.uiwtx.edu | in the field and click 'Connect'
Then, enter your username and password and click 'OK'
- Note: you only must enter this once. Each subsequent time you open the app to connect, you'll only have to enter your username and password.
- Click 'Accept' on the next prompt and the VPN will connect! You'll need to accept this last prompt each time you connect.
- Note: The first time the VPN connects, it will download some updates and might take longer than usual (no longer than a 30 seconds to a minute)
- Don't forget to right click the installer that was created on your desktop and 'Eject' it, as the install is finished and it is no longer needed. This WILL NOT uninstall the CPN and is simply removing the installer.