PaperCut Print Deploy
Introduction
PaperCut Print Deploy is a utility that can be installed in both macOS and Windows that will make it easier to install campus printers. It can be used on all UIW-owned and personal computers by current faculty, staff, and students.
It provides a list of printers that are available to install based on department, current campus location or preference and communicates with UIW's PaperCut system so will only work while on UIW's network. It works while plugged in to an Ethernet connection and on wireless networks uiw-employees and uiw-students.
PaperCut Print Deploy uses a client's UIW username and password for authentication.
Step 1
To install Print Deploy log into Cardinal Apps and open the PaperCut application.
In the left navigation pane select the Print Deploy option for your operating system, Windows or Mac:
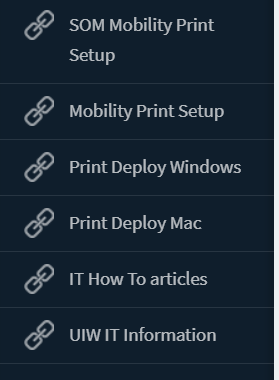
This will open the download page for the Print Deploy Client. Select Download and then run the installer accepting the default options.
Step 2 Add printers with Print Deploy
The Print Deploy app is accessible from your system tray on Windows or from your menu bar on Mac. Click on the icon and choose "View my printers" to open the app.
Windows: 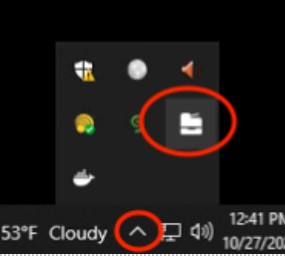
Mac:
The first time you use Print Deploy you will be prompted to sign in. Use your UIW username and password and check the Don't show me this again box:
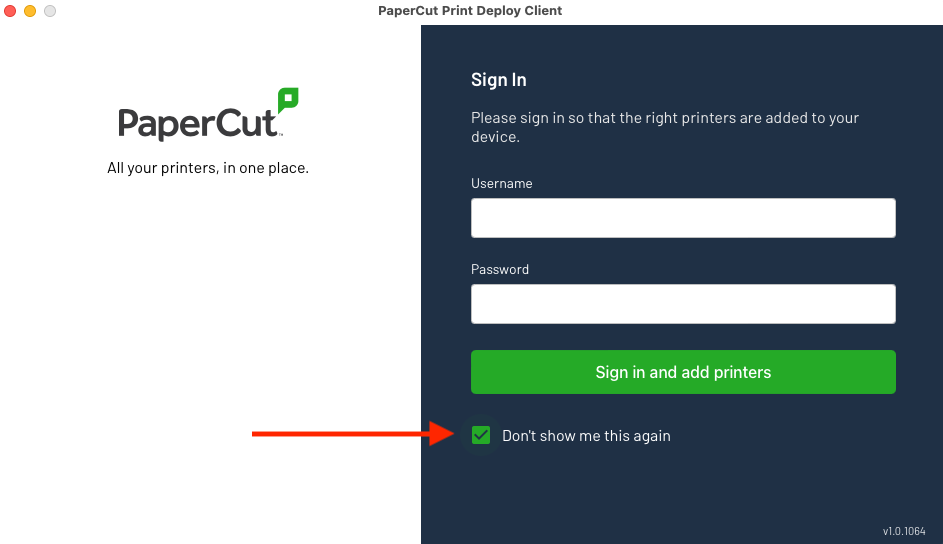
Step 3
After signing in, when you first launch the app you will see a screen that says "We can't find any printers for you":
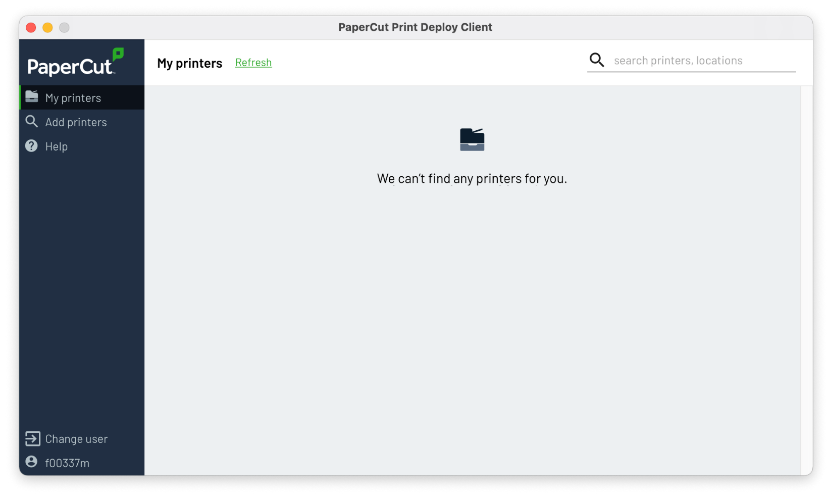
Step 4
Click " Add printers" in the left side bar to find the list of printers available for you to install.
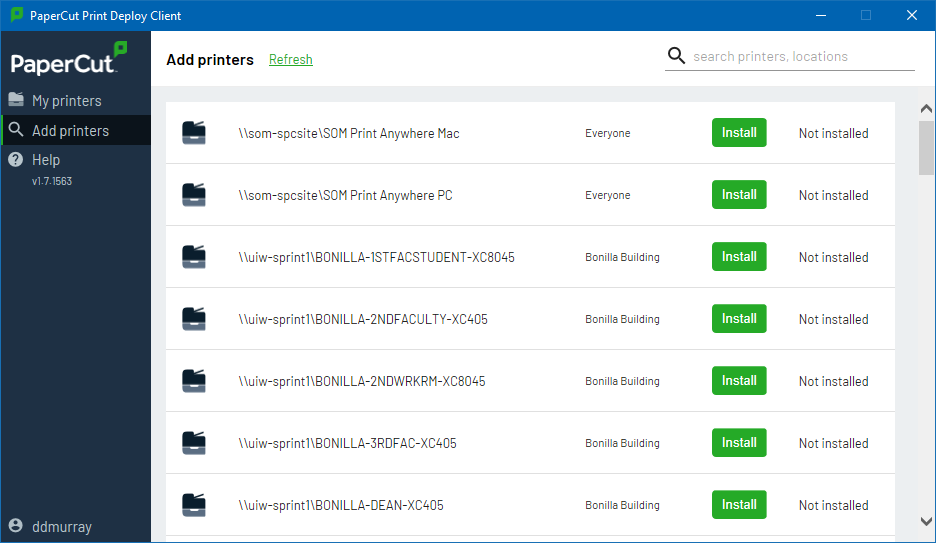
Print Deploy will add these print queues to your printer list, and you'll print just like normal.
Step 5
In conjunction with Print Deploy, installing the PaperCut Client facilitates authentication for personal or Intune-deployed UIW workstations.
1. UIW issued computer joined to the AD domain
2. UIW issued computer joined to a workgroup
3. Personal PC
Scenario 1. UIW issued on Domain:
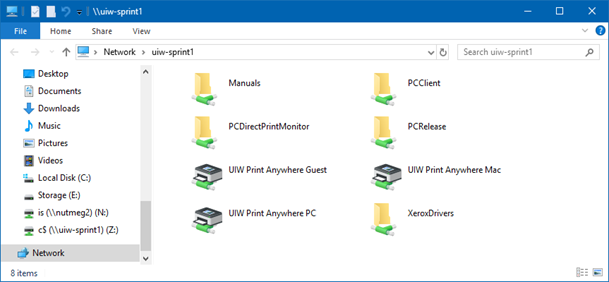
1. Click on the start button and type the following: \\uiw-sprint1.ad.uiwtx.edu to browse to the print server. You can also type this into the White search bar in the bottom left of the screen. Hit ENTER. You’ll see shared folders and printers.
2. Double-click on ‘UIW Print Anywhere PC’ to install the printer. Alternately you can right-click and ‘connect’ to install the printer too.
Scenario 2 & 3 Set up instructions:
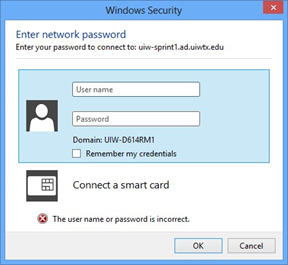
1. Browse to the print server. Click on Start, type ‘\\uiw-sprint1.ad.uiwtx.edu
2. You will be challenged for credentials, username, and password. Enter the username like “ad\<username>” and your network(email) password.
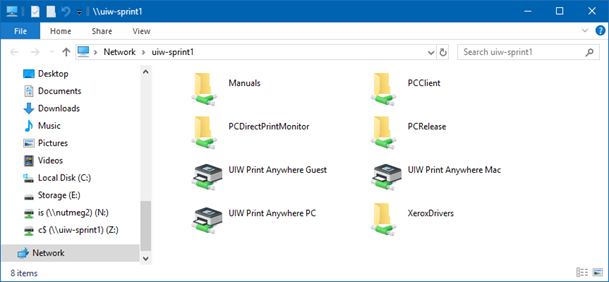
3. Double-click on PCClient, then double-click the ‘win’ folder.
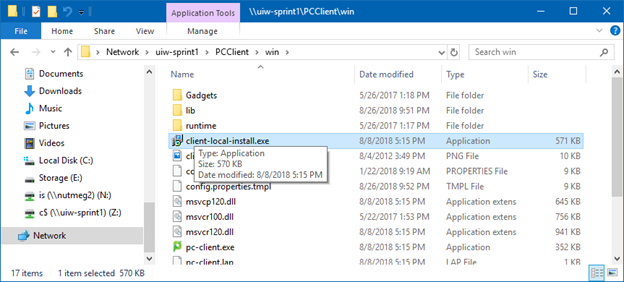
4. Double-click ‘client-install-local’ to start the installation process.
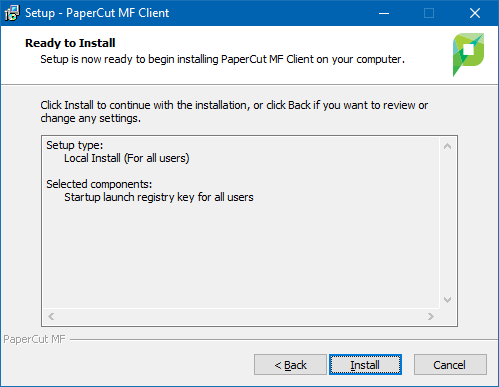
5. When prompted, click yes, Accept Agreement, next, next, install. In other words, accept defaults.
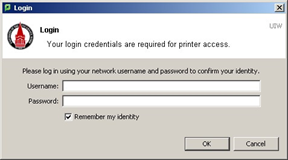
6. When the installation completes, run the program and sign into the client with your network credentials. You do not need to add the ‘ad\’ to your username here.
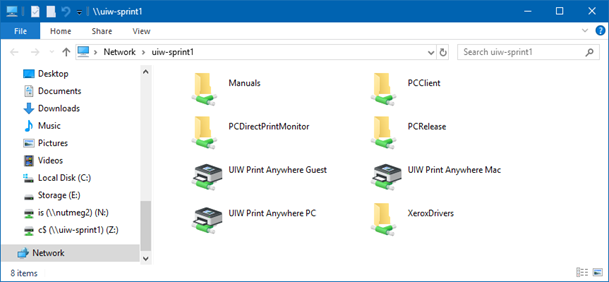
7. Now we can install the printer. Browse to the print server, \\uiw-sprint1.ad.uiwtx.edu, double-click on the ‘UIW Print Anywhere Mac’ printer. Yes, that’s not a typo, choose the ‘UIW Print Anywhere Mac’ printer.
If the PaperCut client software isn’t running, you won’t be able to print. It will look like you printed successfully, but there won’t be any documents waiting in the virtual print queue when you log into a printer and select Print Release.
